Friday, November 25, 2016

Nameko: 5 Reasons to Grow 
This Amazing Mushroom
(plus gill netting Whitefish and a Fish & Nameko Tart recipe)

by Mary Ellen Kozak

The Nameko mushroom is weirdly beautiful. Once you get comfortable with knowing that it is edible (and delectable), you'll take special care to inoculate a few logs with it every year for a regular harvest. Nameko has several other attributes which may encourage you to grow it if you haven't tried it already.


Emerging mushrooms are protected in 
a gelatinous sheath
1. It is eye catching. Nameko is a silky and tender mushroom that is very popular in Japan, especially in soups. As it pops up through cracks in the bark of the log, it is encased with a gelatinous covering that makes the amber colored mushroom glisten and sparkle. The gelatinous covering that adheres to the mushroom when harvested young helps thicken soup broth when simmered. The coating evaporates when sauteed in a fry pan.

2. Just a few logs will satisfy. Plug spawn makes inoculation easy and can be purchased in small quantities, perfect for planting just a few logs, which will produce just enough mushrooms for most miso soup lovers and adventurous cooks. Nameko logs are inoculated just like Shiitake. Inoculated Nameko logs like to lay flat directly on the ground, as they prefer high humidity. As a result, smaller-than-average diameter logs can be successfully incubated with less worry about them drying out, which is often the biggest concern for Shiitake growers using smaller diameter logs. Branches as thin as three inches in diameter can be used, and are often readily available from backyard tree prunings. Diameters any smaller, however, may lead to difficulty when drilling holes.


Early season Nameko fruiting on a
Black Cherry log laid under a Plum tree

3. Nameko grows on unusual wood, not best suited for Shiitake, so therefore is a welcome mushroom alternative. In fact, it is the only cultivated mushroom we have found so far that will produce on Jack Pine. Nameko grows well on Aspen, Box Elder, Cottonwood, Willow, Cherry, Buckeye, Ironwood, Sugar Maple and Sweet Gum. It also yields respectably on Alder, Ash, Basswood, Elm, Hackberry, and Mulberry. And there are likely more promising wood species yet untested.

4. Snow mushrooms? Nameko is considered a late fall fruiter, but has a wide harvest range from leaf fall to snow fall. Most mushroom mycelium slows as Thanksgiving approaches with the exception of some renegade cold weather Shiitake, Oyster and Blewit. Mushrooms will emerge at 40-60F but will continue to develop when days are both colder or warmer than that range. Occasionally Nameko will fruit in the spring. In any case, it's nice to to have one last basket of mushrooms just when you thought everything was done for the season.


Late season Nameko
 often fruits while the snow flies
5. It's easy to identify, once you know its characteristics. Perhaps one reason people avoid growing Nameko is that it falls into the "LBM" category: Little Brown Mushrooms. There are several fall fruiting LBM's that fall into this category, so you MUST (and this is true for all mushrooms) know what you are picking. We will be posting a blog, "Nameko and its Look-Alikes" in January 2017 to provide growers confidence in harvesting this mushroom. Just knowing more about look-alikes and the world of fungi at your feet will make your cultivation experience more exciting.


Nameko plus Whitefish 
Nameko harvest in the Great Lakes states tends to coincide with the abundance of all the foods we think of for fall harvest and the Thanksgiving holiday: cranberries, pumpkin, wild turkey. A late fall harvest that we don't often think about is Lake Whitefish. This fish is very popular with people in the Great Lakes region and restaurants specialize in Whitefish dishes including sauteed Whitefish livers and roe (Nameko pairs very well with fish, and if you'd like to see the tart recipe without the fish-catching specifics below, please scroll to the bottom). Whitefish spawns very late: they spend most of the year in the large lakes, and come into gravelly shallow waters late in the fall to spawn.


Typical BWCA landscape, with fishermen scouting channels
This season I tagged along with my husband Joe and our Minnesotan outdoorsmen friends to join the annual and time honored "Whitefish Camp" in the Boundary Waters Canoe Area Wilderness (BWCA) of northern Minnesota. I spent time, while the nets were being set, looking for the late fall mushroom Galerina marginata and other look-alikes to the Nameko that shares the same fruiting time. I also took some pictures of the whitefishing tradition to share. 


Setting nets
The Boundary Waters Area Canoe Wilderness, located in the Superior National Forest, has deep lakes connected by short shallow rivers, perfect habitat for Lake Whitefish. Minnesotans gather at the mouths of these rivers for the annual gill netting ritual, where hundreds of fish can be netted overnight. Although fishing is highly regulated to protect the population, this fishery has such abundance it can handle dozens of nets with little fear of overfishing. Our friends are expert canoeists and must be so, as it is tricky business to navigate the fast water, secure the nets, and add the floats. First though, nets, floats, dogs, food, fish cleaning gear, tent, and stove all must be humped over several portages before setting camp.  


Portaging gear to the next lake
Interestingly, most of the fishermen (and it definitely WAS a multi-aged but male dominated activity)  I chatted with while they cleaned the buckets and coolers full of fish after harvest, said they hardly ate any Whitefish themselves but were netting for people "in town" who were not able to get out and net fish anymore themselves.

I was offered several methods for canning, pickling, and smoking Whitefish to "give away as gifts". Wow. 


Picking the fish from the net

After the fish were picked from the nets (best done with a crochet hook) the fish were transported back to camp to be cleaned. Our friends had portable wood boards that were fastened to trees where they could process dozens of fish within an hour. Filleted fish were then rinsed and packed into plastic bags for transportation. Fish skeletons and entrails, by the bucketful, were spread for the eagles, ravens, grey jays and other wildlife to make quick work of - my job.  :-)


Checking the nets 

While we did not eat any Whitefish at our Thanksgiving table, we were still slightly amazed at witnessing this incredible resource of local food. Certainly the difficulty of processing the fish in a remote location without modern sportsman conveniences had something to do with controlling greed for such an abundant resource, but it was the respect for which most of the fisherpeople treated the harvest that governed it more. The generous sharing of their abundance with others was perhaps the most remarkable thing to me. I realized that there are people of all walks of life that respect and enjoy and utilize our public lands in a variety of ways.


BWCA Whitefish
The thought of privatizing our public lands and all the implications that come with it must be carefully assessed and considered. Recent congressional action is looking at the transfer of our national forest lands to the states. These transfers, if they do happen, will not guarantee public access to these lands for recreational use and other activities. As a company, whose employees are outdoor enthusiasts and strongly believe in managing forests for long term sustainability, we support two watchdog organizations: The Outdoor Alliance, and Backcountry Hunters and Anglers. By supporting these organizations and letting our representatives know where we stand, we hope that our collective property will be available for future generations to use and enjoy as much as we do now.


Fish and Nameko Tart
This cheese flavored tart features a crust that can be used for any savory pie. It is delicious and really easy to make. The filling can also be adapted to any mushroom (Shiitake especially), although the mushrooms should be sliced and sauteed first rather than poaching as you would for Nameko. The beauty of Nameko in this dish is that these mushrooms are already quite tender and require just a brief poaching. The silky mushrooms pair well with the soft custard of this quiche-style savory. The crust and filling are described separately below until their final assembly.

Crust:
1 oz grated Parmesan or Asiago cheese (use 2 oz if  you love cheese)
½ c unbleached flour
1/8 tsp salt or healthy pinch
2T softened unsalted butter
2T solid vegetable shortening or lard
1TBSP water
1 beaten egg

Makes one 9-inch round tart

Method: Toss the flour, salt and fats with your fingers, rubbing and incorporating as you toss, keeping the mixture airy until crumbly. Add about 1 TBSP water and lift, rub and mix until smooth. Cover the dough and rest  in the refrigerator for 30 minutes or so.

Preheat the oven to 375F. Roll the dough out 2 inches past the diameter of your tart pan, trim the edges and slide it with your rolling pin over the pan. Get the dough settled, patting and crimping until you’ve got a nice pastry layer. Prick the bottom all over with a fork and brush the entire thing with the beaten egg. Pop in the oven and bake until golden, enjoying the toasted cheese smell. Remove the pan from the oven and cool on a rack while preparing the filling.

Filling:
1/2 lb baked, boned and flaked Whitefish (or any firm, mild fish). For a smoky flavored pie, you may substitute up to a 1/4 lb of boned smoked fish.
4-8 oz rinsed and lightly patted dry Nameko. Trim stems to about 1 inch and compost the trimmings.
1/2  c milk and 1 tsp sugar
1 bay leaf
Pinch of salt
1 c sour cream
1 TBSP rinsed capers
Pinch each of nutmeg and black pepper
2 large eggs plus 2 egg yolks
Chopped fresh dill, optional

Method: Lower oven temp to 325F. Heat the milk and sugar until just below a simmer and add the mushrooms and bay leaf. Place a lid on the pan and poach for 2-4 minutes. Remove bay leaf and strain the milk from the mushrooms, discarding any bits or organic matter not mushroom. Reserve both milk and mushrooms in separate bowls.

Add the sour cream to the milk.

In another bowl, whisk the eggs and egg yolks, adding salt and pepper. Slowly add the milk and sour cream mixture, whisking all the while. Pour into the cooled crust.

Sprinkle on top the poached mushrooms, capers and optional dill over the unbaked custard.
Place the filled tart pan on a baking sheet and bake for 30-35 minutes. Let rest for 10 minutes before slicing.

Friday, September 30, 2016

Hors d'oeuvres Recipe Contest 
by Field & Forest Products


If you grow (or love to cook with) Shiitake, Oyster, Lion’s Mane or Wine Cap mushrooms, we bet that you've been asked to "bring something with mushrooms" for a potluck or hors d'oeuvre party. We also bet that many of you have developed or adapted some delicious recipes for those occasions. Enter your favorite mushroom hors d'oeuvres recipe to share with our mushroom growing community for this upcoming holiday season! Our contest is open to hot or cold mushroom hors d'oeuvre recipes using fresh, dried or frozen Shiitake, Oyster, Wine Cap, Lion’s Mane or Comb Tooth mushrooms (or any combination thereof). Entrees will be judged based on their originality, ease of preparation, and taste by Chef Janice Thomas from the Savory Spoon Cooking School in Ellison Bay, Wisconsin.

The Grand Prize winner (1) will receive an 8-Block Starter Set, mix or match. 
Second (1) and third place (1) winners will each receive a Table Top Farm of their choice. 
F&FP reserves the right to publish all contestant recipes (with credit given, of course) on social media and in print.

To enter, send us your recipe by email to info@fieldforest.net or snail mail to Field and Forest Products, N3296 Kozuzek Rd., Peshtigo, WI 54157. Please include your name, address, and phone number.  If you have any questions, please email us at info@fieldforest.net or call us at (800)792-6220. Submission deadline is November 1, 2016. Winners will be announced via Facebook, your email (if provided), and our website, www.fieldforest.net on December 1, 2016.
If you do not wish to enter the contest yourself but would like to see the winning recipes, please check our website on December 1 or see our post on Facebook that day. You can also send us your email address to receive the winning recipes in our December Newsletter.

SHIPPING RESTRICTIONS: FREE UPS standard ground shipping of all 8 blocks (Grand Prize) to be shipped all at once in a single box to a single destination within the lower 48 states only. Mix of blocks in the set may vary depending on requested ship date and available inventory of your block selection. SECOND & THIRD PRIZES: FREE shipping within the lower 48 states only. Preferred ship date can be specified by customer. Ship date is dependent on available inventory.

About our Judge

Chef Janice has over 20 years of experience in the food industry and has owned her own catering company for the last 14 years. Janice also owns and operates the Savory Spoon Cooking School in Ellison Bay, Wisconsin, which hosts weekly cooking classes May through October on a variety of cooking subjects and styles. Janice has been teaching cooking classes for many years in Arizona, Oregon and Wisconsin. Studies at the renowned Cordon Bleu in Paris and with well-respected chefs in France, Italy and China have enhanced Janice's repertoire. We are very excited that she agreed to judge our contest and look forward to her preparing one of the winning recipes in her yearly mushroom cooking class in 2017. For more information on Chef Janice’s classes, culinary tours and her special Panforte, go to www.savoryspoon.com

Thursday, September 22, 2016

How to Plant a Wine Cap Straw Bed
this Fall for a Spring Harvest

by Mary Ellen

Fall fruiting from a straw Wine Cap bed
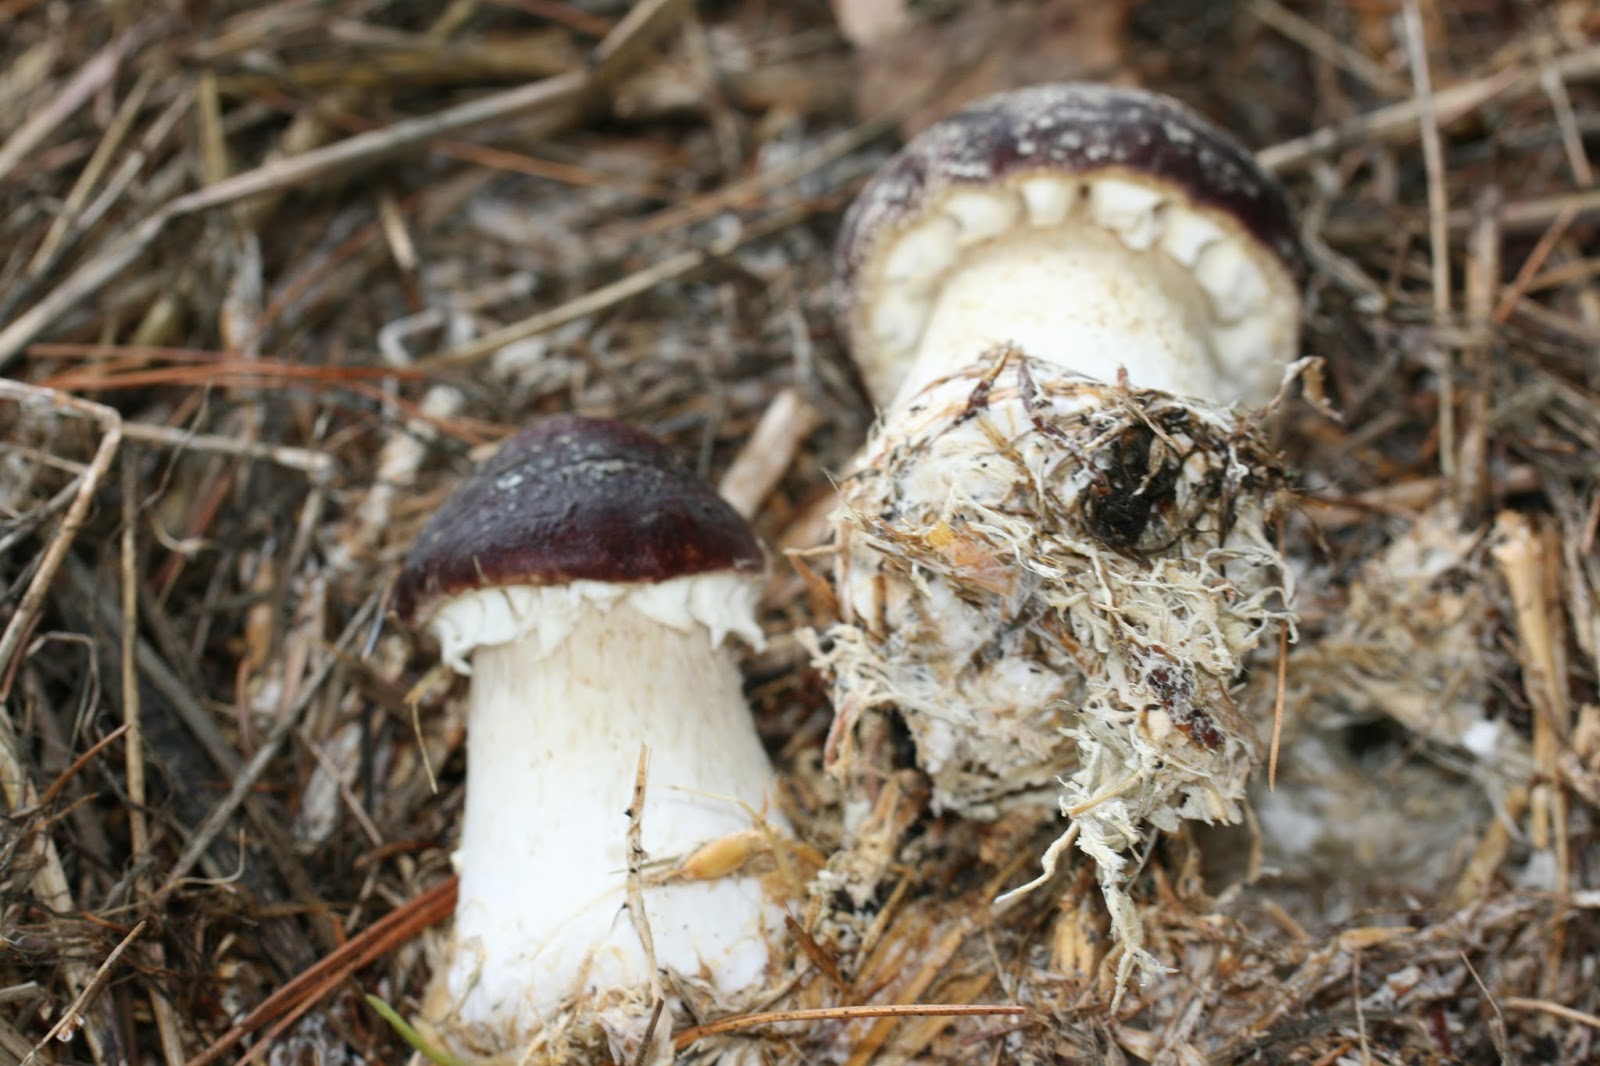
Spring and fall fruiting Wine Caps (Stropharia rugoso-annulata) claim both ends of summer as its normal fruiting time, and even fruits through the summer if there is plenty of rainfall. This past spring our Wine Cap season started at the end of April and the dark red buttons continued to push through the summer except for a few weeks in early August during our "dry" season. Most of these were harvested from straw beds we inoculated just the fall before.

Wine Caps like plenty of airflow for the spawn run phase which possibly is why it grows so well on bits and pieces of a dry matter like straw and chips instead of raw logs such as those used in shiitake cultivation. In fact, a combination of both chips and straw seems to be one of the best ways to grow them; giving a fast start with the looser straw component and longevity with the chip component. Layering the three ingredients (straw, spawn, chips) is quickly becoming our standard practice. For quickest fruiting, such as the following method given for a fall planted spring harvest, use only straw as your primary substrate.

Planning your production. For market gardeners, reliability and consistency is particularly helpful when planning a crop. Fortunately, planting a straw bed this fall (usually by garlic planting time... often mid fall) will usually yield a nice crop in spring without the worries of beds drying out or overheating as can happen with spring planted straw beds. Wine Caps are well adapted for a fall planting because of its supreme hardiness and ability to grow in cool temperatures, thus out competing other fungi common in straw in warmer temperatures.

Wood chip beds that we inoculated this spring are just starting to fruit now and should carry us through fall and all of next year as long as daytime temperatures stay 50° F or more.
This fall inoculated Wine Cap mycelium is chewing up the straw and pushing up mushrooms.
Notice the mycelial rootlets under the stem. By the end of the bed life, a nice mat of
dark organic matter remains where there once was 6-10 inches of fluffy straw.
Here's how we do it:
  • Choose your location. You can get as strategic as you want; fully shaded areas will produce 2-3 weeks later, partially shaded areas will start fruiting earlier. Avoid grassy areas unless you lay wet cardboard down over the grass first to smother the grass. Avoid full sun as some warm, dry spring days can turn the succulent red capped mushrooms to dry leathery silver caps within hours. Partial shade is usually best; full shade in the south.
  • Gather your straw. We have used bales of straw left uncovered in the field for a year but it is better to use bright, clean, dry straw (oat, wheat, rye ... NOT hay!) that has been covered during storage.
  • Purchase your spawn. While you can transfer spawn from old beds to this new bed, production is much greater if you use fresh spawn hungry for new organic matter. A 5.5 lb. bag of sawdust spawn will inoculate a small square bale (about 32 lbs.) spread out in a 7 ft. by 7 ft. area or about 50 sq ft.
  • Wet the straw before spreading it out. We like to soak the bales, preferably for 3-5 days (throw the bound bales in a tank or pack even more in loose) just prior to building the bed. We have also spread dry straw out prior to a rainy spell, waiting for natural hydration to occur. We are still trying to determine if the biological activity that occurs during a long soak is helpful in Wine Cap cultivation. We can certainly say it does not hurt. The setup of our tanks (see below) allows for a long soak. We just pull the plugs (as shown) just prior to laying out the bed.
Draining the straw filled livestock tanks a few hours before inoculating.

  • After you drain away the water from the straw, spread out the straw into a 2-inch thick layer, and sprinkle with half of the spawn. Then add 2 more inches of straw, and sprinkle on the remaining half bag of spawn. Finally, add the remaining straw and pat the bed down with a lawn rake.
  • Securely fasten an 8' x 8' ft. piece of plastic over the bed. Take the plastic off in the spring and wait for fruiting! Save the plastic sheet for a spring-made bed... make the bed in the same way, but lift the plastic sheet off in 28 days. If your prefer, use a wood chip covering. In fact this is often preferable as it allows more airflow and is eventually decomposed by the mycelium. Any wood chip will work; for now, you just need it as a "mulch" to keep the straw from drying out.
  • After you think your Wine Cap bed is done fruiting for good, throw some woodchips or sawdust on top for easy rejuvenation. A little proactivity can be easy mushrooms!

This straw bed has been inoculated for only 4 days and was covered with fresh spruce wood chips 
just after inoculation. The white threads are quickly moving Wine Cap mycelium.
If you have wood chips and not straw, you can certainly inoculate this fall but you may not get mushrooms this coming spring, rather, a nice fruiting later in the summer. We fall plant both wood chip beds, straw beds and combination beds of chips/straw/old sawdust to make sure we have Wine Cap mushrooms all season long.

Perfect for pickling! 

Tuesday, March 22, 2016

Cut Your Wood Now, Worry Later
Written by Mary Ellen

Warm winds are regularly now bringing in temperatures of 50 degrees (F) in early March here in Northern Wisconsin. It's time to face the fact that we really are not going to have a winter, after all.  And we are not alone; everyone else in the lower 48 seems to be faced with the same conclusion. With the warm wind comes confusion … and panic over log cutting times and inoculation dates.

Shiitake logs waiting to be picked up.

Conflicting information abounds about when to cut wood for Shiitake cultivation and how long you can let it sit around before it has to be inoculated. The standard advice: cut the trees when dormant, inoculate by the time hot weather arrives (or as the Japanese say, by cherry blossom time). Should be simple, right? Sure enough though, we’ve heard everything from aging the wood 6 months to getting wood inoculated within 3 days, or no later than two weeks after felling or as soon as possible after felling. And the list goes on and on. And of course there are nuances ... softer woods should be inoculated as soon as possible, as should summer cut wood. But that’s a subject for another blog post! As with life in general, there is the "Best Practices" category and then there is the "Do Our Best" category. At F&FP, we definitely find ourselves in the latter category when it comes to log inoculation. 

These logs, restacked from a forestry site, are awaiting inoculation.

Best Practices:

DO cut the trees while dormant.  This is the period where water in the inner bark is low, insuring tight bark retention for the life of the log, and the amount of carbohydrates is high.  Bud swell is a visual indication of dormancy breaking. To the unpracticed eyes, dormancy means no leaves, even itty bitty ones. In fact it means little green in the buds at all; the buds being tight.

DO let the wood age or "cure"… at least 2 weeks if possible. Though inoculating immediately after cutting the wood will not kill the spawn, it may not “invite” hyphal growth for a time period, so in essence spawn becomes a “sitting duck” for awhile. If spawn sites, sawdust spawn in particular, are not properly sealed, there is a risk of it drying out if the logs are subject to wind and warmth before growth commences. Inoculation between 2-4 weeks of felling is probably ideal but picking the "perfect time" will depend on weather, geographic location, wood species, location of the tree and location of wood ON the tree, diameter and bark thickness and where and how the wood is cured. 

DON’T let the wood dry out. How much curing time is determined by the rate of drying. Here is where you have some control … if you want to inoculate very soon after felling, stack the logs loosely with lots of air space (but still keep them out of direct sun where the bark may get excessively hot, causing some disease problems and uneven drying).On the other hand, wood cut in the dormant period can wait for months to inoculate after felling if they dry slowly, such as in cold, snow covered locations. If you are concerned that wood cut very early in the dormant season (such as fall) is too dry (after months of cool weather laying in the woods), take a moisture sample. Optimal moisture content in bed logs is 40-45 % moisture, but growth is possible from 20-47%.  

If it is going to be a month or more before you inoculate your wood from the date of felling, bulk stack the wood in a protected area away from direct sun to slow the drying and keep the bark cool. 

Do Our Best:

Bottom Line,  for best results, get your wood cut now, but don’t let the hurry of and early spring allow for poor choice of tree selection in the woods; fall is only a few months away and is also a great time for inoculation! Once you’ve procured your wood, relax and then schedule your inoculation. Have a few tarps or another porous material such as pine or cedar boughs handy to cover the logs and prepare a protected place to stack your logs while you get everything else together.

Waxing log ends and big branch wounds
People are often willing to spend the extra time and money to melt a big pot of wax and dip log ends to seal in the moisture and keep out contaminants as the wood cures. Waxing log ends might slow the drying rate and will certainly allow you to see spawn run at the log ends even under dry conditions. What keeps moisture in will also keep moisture out so if you are soaking logs to force fruit them, it is best to not wax log ends. If you have very large logs (greater than 8 inches in diameter) that will not be force fruited and will be curing for months prior to inoculation (northern states: think harvest in February and inoculation in May) waxing may be helpful but certainly not essential. If you have large cuts where branches were trimmed away (greater than 4 inches in diameter), waxing those wounds is helpful

What if you can't inoculate your logs in a timely fashion? When is the wood too dry? Do I soak the logs in water before I inoculate?
If you know its going to be at least a month after felling the wood before inoculation, bulk stack the wood in a shaded, protected location. If weather is warm, dry and windy for several weeks, water the logs for 1-2 hours at least weekly and loosely cover. 
 You can generally gauge the curing progress of the wood by checking the cracks at the end of the logs. Cracks begin from the center of the wood and move outward; fine cracks reaching halfway from center to the the bark indicate that the  inoculation conditions are about right. If the cracks are large (you can slide a dime into the largest cracks), consider soaking the logs 24-36 hours and letting them dry a day before inoculation.

Overall, tree selection, timing of cut, log storage and timing inoculation is almost just as much of an art as it is a science. Our goal at Field and Forest Products is to provide people with information so they can make the best possible decisions when it comes to growing mushrooms.

Wednesday, November 25, 2015

Be Thankful for All That Inspires
by Mary Ellen

Swiss chard is always the last thing from the garden that I prepare for the freezer because it stands up so well to frost that I can put off harvest for weeks and weeks and weeks. "If it weren't for the last minute, nothing would get done," said Rita Mae Brown. But with all things biological, timing is everything and when I finally made it out to the garden this is what I found:


Here is what is left of our garden's
gorgeous leafy "Bright Lights" chard.

We have a 6 ft. tall garden fence, but we also have a really healthy deer population. Oh well. I am pretty much over canning and freezing produce anyway.

The good thing about my garden discovery is that it took me past an old Blewit bed that I had made years ago. Sometimes I need a little inspiration when it comes to cooking. Homegrown, fresh harvested vegetables usually provide the spark needed to initiate some creativity in my kitchen. So when I spied a few late flushing Blewits on my way out of the garden, my spirits perked considerably.


Wood Blewit (Clitocybe nuda)
As with most cultivated fungi, there are quick and easy ways to plant and also more complex ways. And like most things in life, you usually get more the greater the effort. In our cultivation instructions for Blewit, we discuss two methods, both including layering lots of compost and lesser amounts of decomposed organic matter with spawn (the instructions are provided with orders of Blewit spawn, but also can be found on our website's Seasonal Planting Chart link under "Blewits in the Garden").

There are two things I really appreciate about Blewits. One is their lovely lilac color and fairly dense flesh. The second is their long fruiting period in the fall. The fall Blewit is Clitocybe nuda, formerly known as Lepista nuda. I don't know what the etyology of nuda is except that the earlier Blewits grown under warmer temperatures tend to have a fleshy color and appearance. Later Blewits tend to be a little more true blue. Recently, we have been cultivating another Blewit, also known as Blue Leg, whose scientific name is Clitocybe sordida. This Blewit looks very different than Clitocybe nuda and fruits quite a bit earlier, usually mid to late august. It lacks the bulbous stem and meaty cap, instead developing a thin stalk and knobby cap. It is a nice litter decomposer that can be grown later in the summer. We will be offering this species for the first time in 2016, so watch for it if you're interested in growing it!


Blue Leg or Clitocybe sordida

But for now, I have to share this delicious creation, because if you are a gardener like me, right now you probably have too much squash on hand. Here is a way to reduce your porch stash of squash by at least one!


The recipe below will help you clear a path to your kitchen door
(and fill some seats at your table)!

Inspired Blewit and Spaghetti Squash GratinThis layered gratin is a take-off on pasta alfredo, but better and certainly more healthful. The squash is the base layer, followed by a tomato layer and then topped with a ricotta custard decorated with thick slices of roasted Blewit. Consider purchasing whole milk ricotta for this dish for even richer flavor.

Gratin just out of the oven.

Preheat oven to 350°F. Wack the squash across the middle with a cleaver and scoop out the seeds.
Roast the Squash and Blewits: Place the halves cut side down on a greased cookie sheet and bake until tender, about 50-60 minutes. Meanwhile, stem the Blewits and thickly slice the caps. Brush them with olive oil and lay out on a cookie sheet and roast until they brown on the edges, about 20 minutes (you can use any mushroom, but it's a nice way to use Blewits if you only have a few). Set aside when done. When the squash is tender, let it cool a bit and scoop out its stringy flesh, separating it with a fork. Season with butter, salt, and pepper to taste.

Tomato Layer: All you need is a few cups of sauce to cover the squash once it is spread out on the bottom of the gratin pan. I used a homemade sauce with roasted vegetables, but you can use whatever sauce you like. A chunky sauce with texture works nicely.

Custard Layer:
1 c ricotta cheese
1 c milk
1/4 c grated Asiago or other hard cheese
2 eggs
1/4 heaping  tsp salt and pepper
Whisk all together

Assembly:
Butter a gratin pan (I used a 2 qt. casserole dish). Lay down a layer of squash, spoon the tomato sauce over it, and then pour the ricotta custard over the top. Place the Blewit slices in a decorative fashion on top, and bake at 350°F for 40-60 minutes. Cool 10 minutes before cutting into squares. Was it good? I ate a half pan in one night :-) Enjoy!


Layers of squash, tomato. cheesy custard and Blewit,
paired with a green salad. You'll be very thankful.