
Written by Mary Ellen
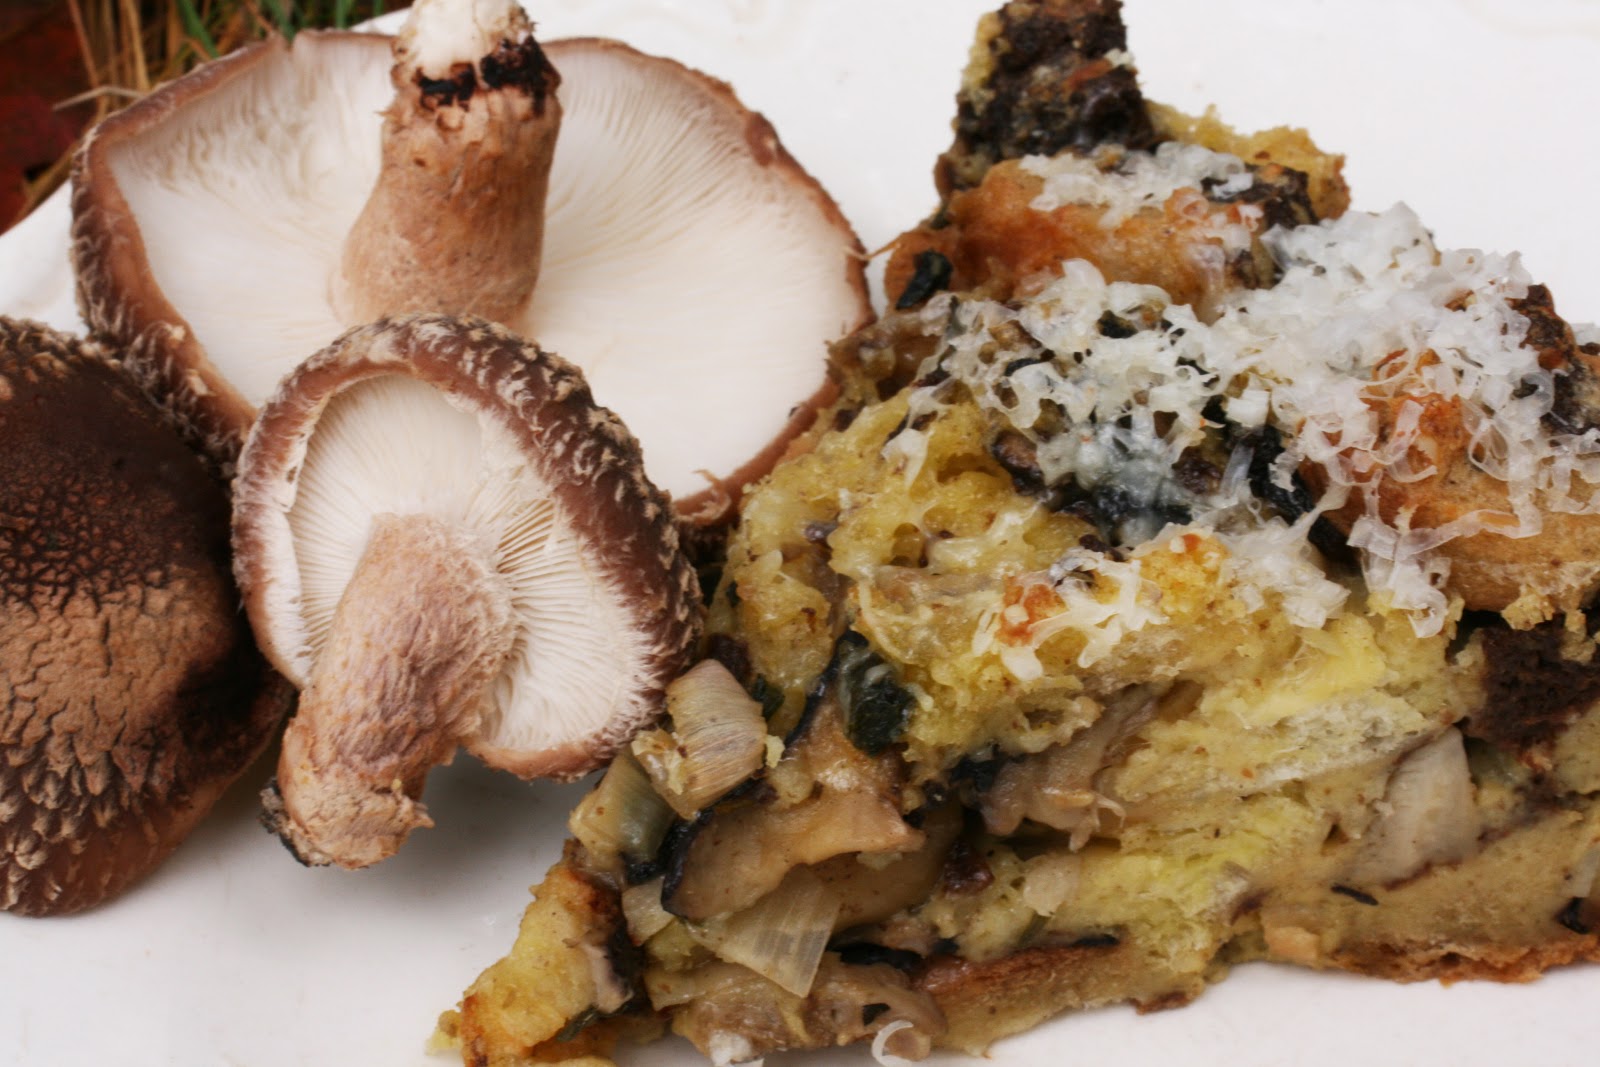 |
| Shiitake Bread Pudding |
Last year during fall shiitake harvest time, Rachel here at F&FP, experimented with mushroom bread puddings. There is nothing quite like great produce to inspire good cooks, and the fall shiitake have been nothing short of exceptional.
Recently, we remembered that day when she brought in last years creation, gorgeous and creamy, studded with mushrooms on a teal colored plate for Food Friday. We thought we’d make up a pan. Alas, the recipe was deleted from our blog, and like most good cooks she couldn’t remember the details of making it. She’s re-created the recipe for us and we thought we’d post it in case you missed it the first time around. Thank you Rachel!
 |
| Cold Weather Shiitake are fruiting here at F&FP, and man are they delicious. Miss Happiness is no exception. |
A Note on “Bread Pudding”
Bread pudding was often called “Poor Man’s Pudding” for the obvious reason that it was made from stale bread. Nowadays a country cook still has thrift in mind, but also an eye toward delectability. Bread puddings are typically thought of as dessert, and take well to finely textured white breads, brioches and even bread crumbs. Savory bread puddings made with these are refined in character, but also can be glorious when made with sourdoughs, French breads and ryes…and Shiitake, as in this bread pudding!
For the best bread puddings, whatever the bread, use one or two day old bread, thereby being slightly dry to soak up the liquids, but not so aged to taste stale.
 |
| Snow Cap: A beautifully ornamented Cold Weather. |
 |
| Chocolov: A Cold Weather full of goodness. |
Shiitake Bread Pudding
6-7 C day old French bread or marble rye, cubed
About 1 lb. Shiitake mushrooms, sliced thin
1 small leek
3-4 cloves garlic
3 Tbsp extra-virgin olive oil
1 tsp thyme
1 tsp sage
1 tsp basil
Parsley and chives
5 eggs
2 C heavy whipping cream
1 C milk
¼ - ½ C parmesan cheese
Salt and pepper to taste
Heat the oil in a large skillet. Add garlic and leeks, sautéing until fragrant. Add the mushrooms and herbs, cook until mushrooms are tender, about 10 minutes. Add salt and pepper to taste.
In a large bowl, whisk together the eggs, cream milk, and parmesan. Toss in the bread cubes and let sit for 5-10 minutes. Gently mix in the mushrooms and pour into a buttered baking dish. Sprinkle with parmesan and bake at 350 for 45 minutes to an hour.
-------------------------------------------------------------------------------------
If the bread pudding is a little dry (a lot depends on the density and moisture of the bread) you can serve it up with a side of Whipped Cream Horseradish Sauce. Come to think of it, whip up a side anyway, you won't regret it.
Whipped Cream Horseradish Sauce
1 c whipping cream
1 T prepared, jarred horseradish
1/4 tsp pepper
Sugar to taste
Whip up the cream to soft peaks and whip in the horseradish and pepper. Eat immediately :)
 |
| Bellwether: F&FP's newest Cold Weather Strain. |


